> ## Documentation Index
> Fetch the complete documentation index at: https://mintlify-poc.mintlify.site/llms.txt
> Use this file to discover all available pages before exploring further.
# Integrate a slack-native AI agent
> Unify company knowledge with slack-native AI agents
export const SERVICE_LONG = 'Tiger Cloud service';
export const SELF_LONG = 'self-hosted TimescaleDB';
export const CONSOLE = 'Tiger Console';
export const SERVICE_LONG = 'Tiger Cloud service';
export const CLOUD_LONG = 'Tiger Cloud';
export const MCP_SHORT = 'MCP Server';
export const COMPANY = 'Tiger Data ';
export const PG = 'Postgres';
export const AGENTS_CLI = 'Tiger Agent CLI';
export const AGENTS_SHORT = 'Agent';
export const AGENTS_LONG = 'Tiger Agents for Work';
{AGENTS_LONG} is a Slack-native AI agent that you use to unify the knowledge in your company. This includes your Slack
history, docs, GitHub repositories, Salesforce and so on. You use your {AGENTS_SHORT} to get instant answers for real
business, technical, and operations questions in your Slack channels.
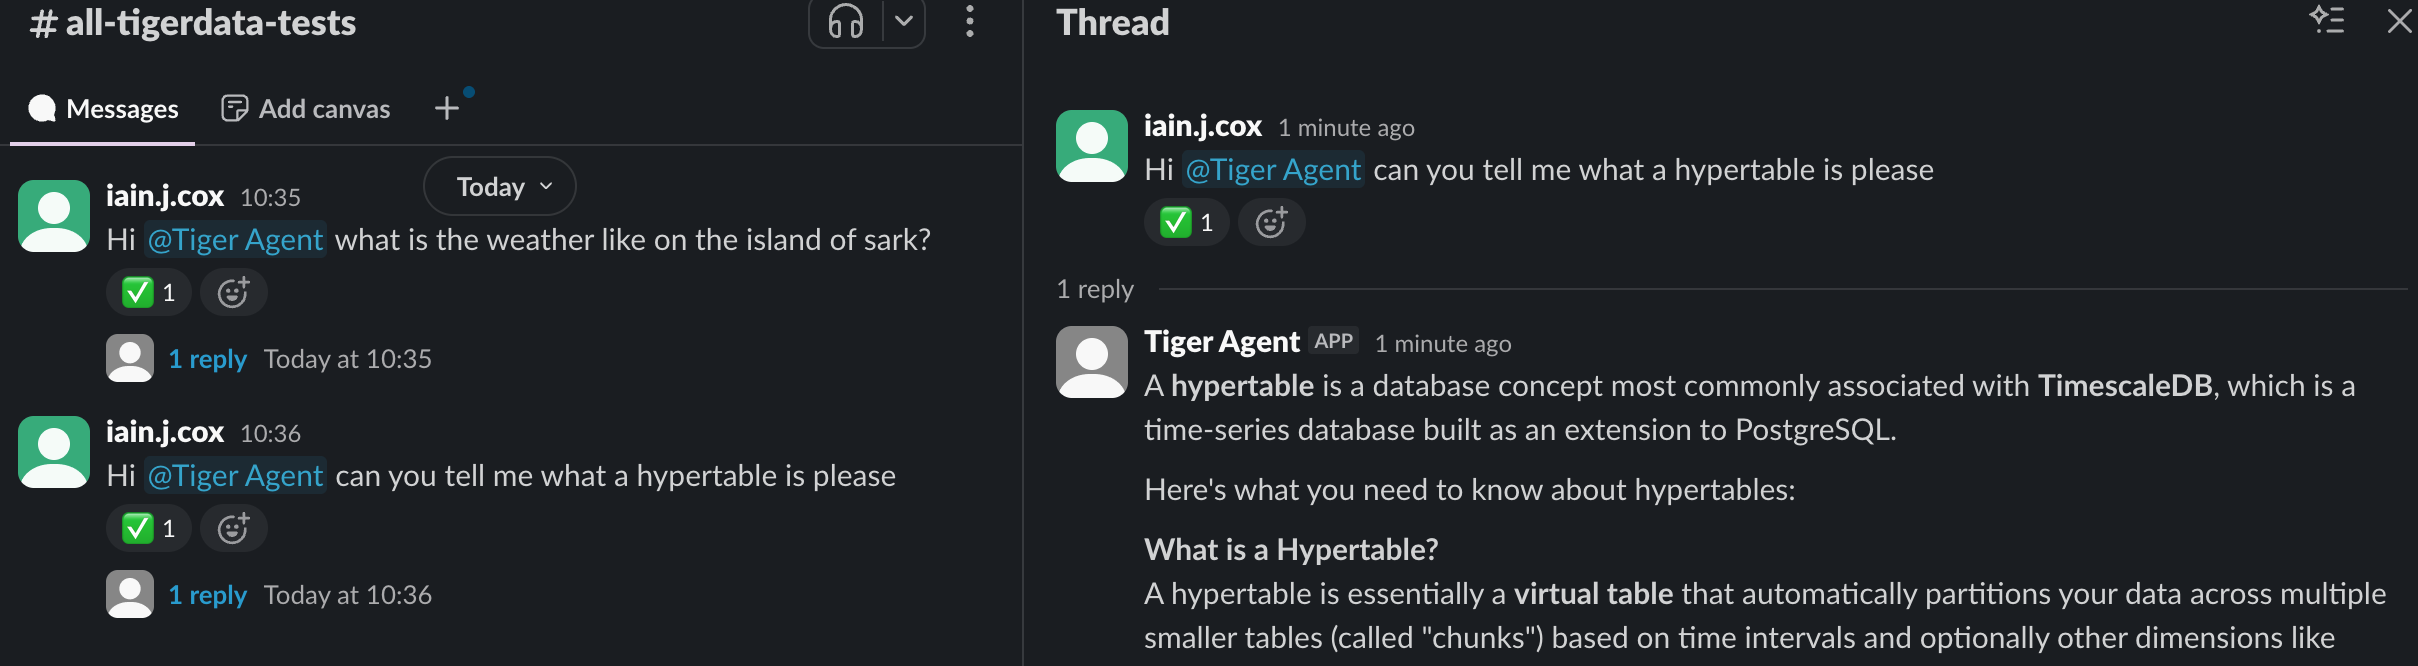
{AGENTS_LONG} can handle concurrent conversations with enterprise-grade reliability. They have the following features:
* **Durable and atomic event handling**: {PG}-backed event claiming ensures exactly-once processing, even under high concurrency and failure conditions
* **Bounded concurrency**: fixed worker pools prevent resource exhaustion while maintaining predictable performance under load
* **Immediate event processing**: {AGENTS_LONG} provide real-time responsiveness. Events are processed within milliseconds of arrival rather than waiting for polling cycles
* **Resilient retry logic**: automatic retry with visibility thresholds, plus stuck or expired event cleanup
* **Horizontal scalability**: run multiple {AGENTS_SHORT} instances simultaneously with coordinated work distribution across all instances
* **AI-Powered Responses**: use the AI model of your choice, you can also integrate with MCP servers
* **Extensible architecture**: zero code integration for basic agents. For more specialized use cases, easily customize your agent using [Jinja templates][jinja-templates]
* **Complete observability**: detailed tracing of event flow, worker activity, and database operations with full [Logfire][logfire] instrumentation
This page shows you how to install the {AGENTS_CLI}, connect to the {COMPANY} MCP server, and customize prompts for
your specific needs.
## Prerequisites
To follow the steps on this page:
* Create a target [{SERVICE_LONG}][create-service] with Real-time analytics enabled.
You need [your connection details][connection-info]. This procedure also
works for [{SELF_LONG}][enable-timescaledb].
[create-service]: /deploy-and-operate/tiger-cloud/get-started/create-services
[enable-timescaledb]: /deploy-and-operate/self-hosted/install-and-update/install-self-hosted
[connection-info]: /integrations/find-connection-details
* Install the [uv package manager][uv-install]
* Get an [Anthropic API key][claude-api-key]
* Optional: get a [Logfire token][logfire]
## Create a Slack app
Before installing {AGENTS_LONG}, you need to create a Slack app that the {AGENTS_SHORT} will connect to. This app
provides the security tokens for Slack integration with your {AGENTS_SHORT}:
1. **Create a manifest for your Slack App**
1. In a temporary directory, download the {AGENTS_SHORT} Slack manifest template:
```bash theme={"dark"}
curl -O https://raw.githubusercontent.com/timescale/tiger-agents-for-work/main/slack-manifest.json
```
2. Edit `slack-manifest.json` and customize your name and description of your Slack App. For example:
```json theme={"dark"}
"display_information": {
"name": "Tiger Agent",
"description": "Tiger AI Agent helps you easily access your business information, and tune your Tiger services",
"background_color": "#000000"
},
"features": {
"bot_user": {
"display_name": "Tiger Agent",
"always_online": true
}
},
```
3. Copy the contents of `slack-manifest.json` to the clipboard:
```shell theme={"dark"}
cat slack-manifest.json| pbcopy
```
2. **Create the Slack app**
1. Go to [api.slack.com/apps](https://api.slack.com/apps).
2. Click `Create New App`.
3. Select `From a manifest`.
4. Choose your workspace, then click `Next`.
5. Paste the contents of `slack-manifest.json` and click `Next`.
6. Click `Create`.
3. **Generate an app-level token**
1. In your app settings, go to `Basic Information`.
2. Scroll to `App-Level Tokens`.
3. Click `Generate Token and Scopes`.
4. Add a `Token Name`, then click `Add Scope`, add `connections:write` then click `Generate`.
5. Copy the `xapp-*` token locally and click `Done`.
4. **Install your app to a Slack workspace**
1. In the sidebar, under `Settings`, click `Install App`.
2. Click `Install to `, then click `Allow`.
3. Copy the `xoxb-` Bot User OAuth Token locally.
You have created a Slack app and obtained the necessary tokens for {AGENTS_SHORT} integration.
## Install and configure your Agent instance
{AGENTS_LONG} are a production-ready library and CLI written in Python that you use to create Slack-native AI agents.
This section shows you how to configure a {AGENTS_SHORT} to connect to your Slack app, and give it access to your
data and analytics stored in {CLOUD_LONG}.
1. **Create a project directory**
```bash theme={"dark"}
mkdir my-tiger-agent
cd my-tiger-agent
```
2. **Create a {AGENTS_SHORT} environment with your Slack, AI Assistant, and database configuration**
1. Download `.env.sample` to a local `.env` file:
```shell theme={"dark"}
curl -L -o .env https://raw.githubusercontent.com/timescale/tiger-agent/refs/heads/main/.env.sample
```
1. In `.env`, add your Slack tokens and Anthropic API key:
```bash theme={"dark"}
# Slack tokens (from the Slack app you created)
SLACK_APP_TOKEN=xapp-your-app-token
SLACK_BOT_TOKEN=xoxb-your-bot-token
# Anthropic API key
ANTHROPIC_API_KEY=sk-ant-your-api-key
# Optional: Logfire token for enhanced logging
LOGFIRE_TOKEN=your-logfire-token
```
1. Add the [connection details][connection-info] for the {SERVICE_LONG} you are using for this {AGENTS_SHORT}:
```bash theme={"dark"}
PGHOST=
PGDATABASE=tsdb
PGPORT=
PGUSER=tsdbadmin
PGPASSWORD=
```
1. Save and close `.env`.
3. **Add the default {AGENTS_SHORT} prompts to your project**
```bash theme={"dark"}
mkdir prompts
curl -L -o prompts/system_prompt.md https://raw.githubusercontent.com/timescale/tiger-agent/refs/heads/main/prompts/system_prompt.md
curl -L -o prompts/user_prompt.md https://raw.githubusercontent.com/timescale/tiger-agent/refs/heads/main/prompts/user_prompt.md
```
4. **Install {AGENTS_LONG} to manage and run your AI-powered Slack bots**
1. Install the {AGENTS_CLI} using uv.
```bash theme={"dark"}
uv tool install --from git+https://github.com/timescale/tiger-agents-for-work.git tiger-agent
```
`tiger-agent` is installed in `~/.local/bin/tiger-agent`. If necessary, add this folder to your `PATH`.
2. Verify the installation.
```bash theme={"dark"}
tiger-agent --help
```
You see the {AGENTS_CLI} help output with the available commands and options.
5. **Connect your {AGENTS_SHORT} with Slack**
1. Run your {AGENTS_SHORT}:
```bash theme={"dark"}
tiger-agent run --prompts prompts/ --env .env
```
If you open the explorer in [{CONSOLE}][portal-ops-mode], you can see the tables used by your {AGENTS_SHORT}.
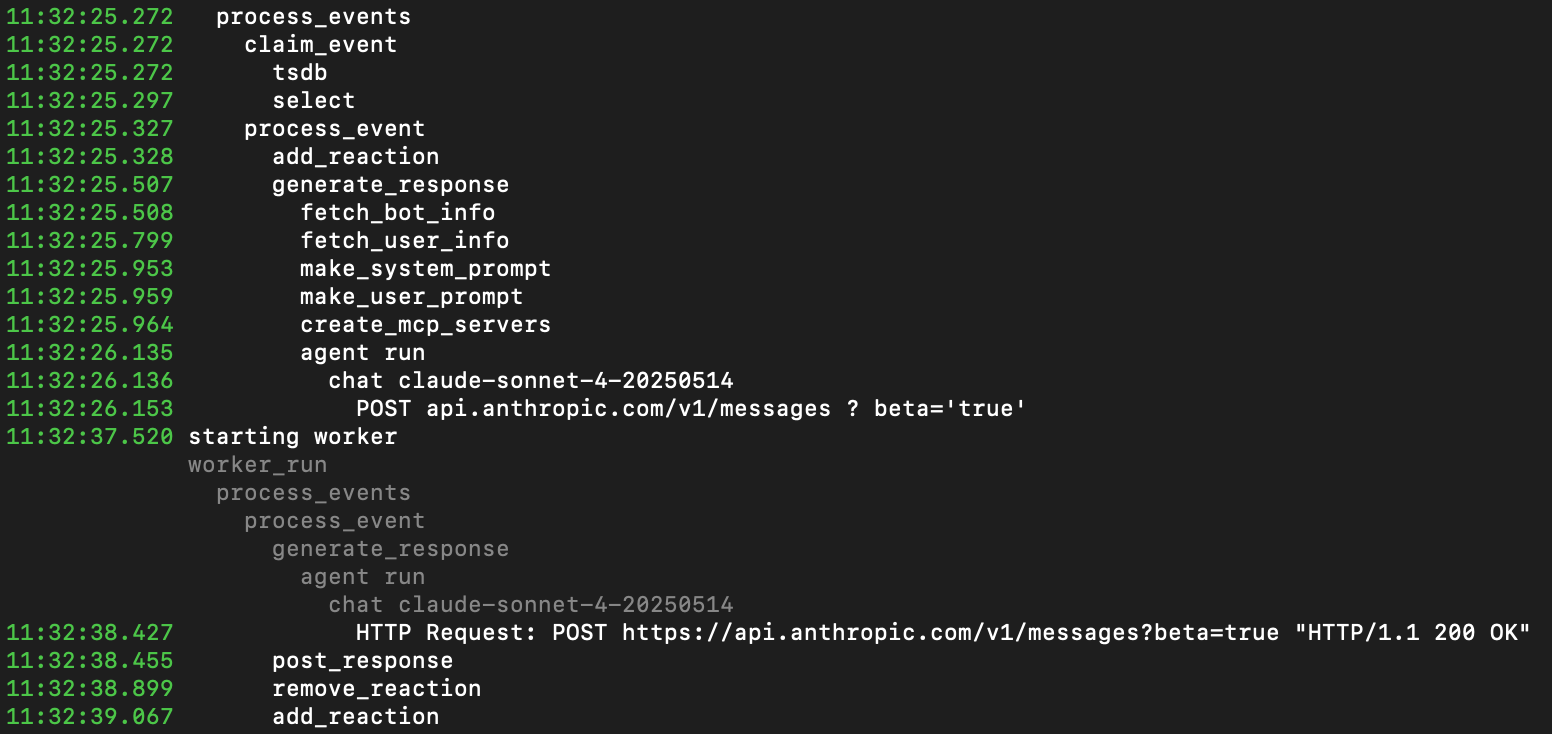
2. In Slack, open a public channel app and ask {AGENTS_SHORT} a couple of questions. You see the response in your
public channel and log messages in the terminal.
## Add information from MCP servers to your Agent
To increase the amount of specialized information your AI Assistant can use, you can add MCP servers supplying data
your users need. For example, to add the {COMPANY} MCP server to your {AGENTS_SHORT}:
1. **Copy the example `mcp_config.json` to your project**
In `my-tiger-agent`, run the following command:
```bash theme={"dark"}
curl -L -o mcp_config.json https://raw.githubusercontent.com/timescale/tiger-agent/refs/heads/main/examples/mcp_config.json
```
2. **Configure your {AGENTS_SHORT} to connect to the most useful MCP servers for your organization**
For example, to add the {COMPANY} documentation MCP server to your {AGENTS_SHORT}, update the docs entry to the
following:
```json theme={"dark"}
"docs": {
"tool_prefix": "docs",
"url": "https://mcp.tigerdata.com/docs",
"allow_sampling": false
},
```
To avoid errors, delete all entries in `mcp_config.json` with invalid URLs. For example the `github` entry with `http://github-mcp-server/mcp`.
3. **Restart your {AGENTS_SHORT}**
```bash theme={"dark"}
tiger-agent run --prompts prompts/ --mcp-config mcp_config.json
```
You have configured your {AGENTS_SHORT} to connect to {MCP_SHORT}. For more information,
see [MCP Server Configuration][mcp-configuration-docs].
## Customize prompts for personalization
{AGENTS_LONG} uses Jinja2 templates for dynamic, context-aware prompt generation. This system allows for sophisticated
prompts that adapt to conversation context, user preferences, and event metadata. {AGENTS_LONG} uses the following
templates:
* `system_prompt.md`: defines the AI Assistant's role, capabilities, and behavior patterns. This template sets the
foundation for the way your {AGENTS_SHORT} will respond and interact.
* `user_prompt.md`: formats the user's request with relevant context, providing the AI Assistant with the
information necessary to generate an appropriate response.
To change the way your {AGENTS_SHORT}s interact with users in your Slack app:
1. **Update the prompt**
For example, in `prompts/system_prompt.md`, add another item in the `Response Protocol` section to fine tune
the behavior of your {AGENTS_SHORT}s. For example:
```shell theme={"dark"}
5. Be snarky but vaguely amusing
```
2. **Test your configuration**
Run {AGENTS_SHORT} with your custom prompt:
```bash theme={"dark"}
tiger-agent run --mcp-config mcp_config.json --prompts prompts/
```
For more information, see [Prompt tempates][prompt-templates].
## Advanced configuration options
For additional customization, you can modify the following {AGENTS_SHORT} parameters:
* `--model`: change AI model (default: `anthropic:claude-sonnet-4-20250514`)
* `--num-workers`: adjust concurrent workers (default: `5`)
* `--max-attempts`: set retry attempts per event (default: `3`)
Example with custom settings:
```bash theme={"dark"}
tiger-agent run \
--model claude-3-5-sonnet-latest \
--mcp-config mcp_config.json \
--prompts prompts/ \
--num-workers 10 \
--max-attempts 5
```
Your {AGENTS_SHORT}s are now configured with {COMPANY} MCP server access and personalized prompts.
[jinja-templates]: https://jinja.palletsprojects.com/en/stable/
[logfire]: https://pydantic.dev/logfire
[claude-api-key]: https://console.anthropic.com/settings/keys
[create-a-service]: /deploy-and-operate/get-started/create-services
[uv-install]: https://docs.astral.sh/uv/getting-started/installation/
[connection-info]: /integrations/find-connection-details
[portal-ops-mode]: https://console.cloud.timescale.com/dashboard/services
[mcp-configuration-docs]: https://github.com/timescale/tiger-agents-for-work/blob/main/docs/mcp_config.md
[prompt-templates]: https://github.com/timescale/tiger-agents-for-work/blob/main/docs/prompt_templates.md